How to use Vue.JS and Django
Lately, I have been seeing an increasing amount of questions specifically regarding the use of Vue.JS in Django. In this tutorial, I will go through two options on how to use Vue with Django. There are more options, but these two are the most straightforward and probably easiest to use/set up.
For the sake of not having to scroll through all the text:
1. Use Vue.JS and Django separated
In my opinion, this is by far my favorite of the two. We will be able to use both Vue and Django to their full potential. The downside of this is that there is generally a bit more work involved in both setting it up and using them. You will also need to learn to become good at both of them to really get the best of both worlds (you could also outsource either the frontend or the backend).
Installing Django
Create a new folder and start a new Django project in that. In case you don't create projects that often, here are a commands on how to do that (Mac/Linux):
mkdir -p new_project
cd new_project
virtualenv .env --python=python3.8
source .env/bin/activate
pip install django
django-admin startproject back
cd back
python manage.py migrate
python manage.py runserver
Which should result in this:
Watching for file changes with StatReloader
Performing system checks...

System check identified no issues (0 silenced).
February 05, 2020 - 15:13:22
Django version 3.0.3, using settings 'back.settings'
Starting development server at http://127.0.0.1:8000/
Quit the server with CONTROL-C.
Also, note that I am calling this Django project back. I do that on purpose. We will call the front end part front. You are free to change the names of course, but I've always found this to be a good approach.
Installing Vue
Then we need to open up a new terminal window and create the front end. For this, you need to install Node and NPM. I will not get into the details of that. Once you have done that, you can move on with the instructions below.
Run npm install -g @vue/cli to install the CLI we need for Vue. Once you have installed that, run this:
vue create front
If it asks you to install Babel/eslint, then just hit return. It will need a minute to create the template.
The end result should look like this:
added 1221 packages from 860 contributors and audited 24412 packages in 26.392s
found 0 vulnerabilities

🚀  Invoking generators...
📦  Installing additional dependencies...

added 64 packages from 40 contributors and audited 24694 packages in 8.26s
found 0 vulnerabilities

⚓  Running completion hooks...

📄  Generating README.md...

🎉  Successfully created project front.
👉  Get started with the following commands:

 $ cd front
 $ npm run serve
Do what it says and enter cd front and then npm run serve.
You will now get to see a local address (probably http://localhost:8080/). If you go to that, then you will see the default Vue page. The CLI also added a bunch of files in our newly created front folder.
Now we have a Django site running and a Vue site running. Now... how do we connect them?
Preparing Django
Within Django, we will now create a new app and install Django Rest Framework (DRF). Don't forget to add the new app to INSTALLED_APPS in your settings.py file.
python manage.py startapp notes
pip install djangorestframework django-cors-headers
In your settings.py file, add this to INSTALLED_APPS:
INSTALLED_APPS = [
    'django.contrib.admin',
    'django.contrib.auth',
    'django.contrib.contenttypes',
    'django.contrib.sessions',
    'django.contrib.messages',
    'django.contrib.staticfiles',
    ## add here
    'rest_framework',
    'corsheaders',
    'notes'
]
Also add this in that same file to make CORS work:
# This should be changed once we put this in production.
CORS_ORIGIN_ALLOW_ALL = True
Setting up CORS will allow us to make requests from other links. localhost:8000 and localhost:3000 might look like the same domain, but CORS is pretty strict. What's considered the same is pretty strict.
You will also need CORS if you decide to set up the API server and the Client server on a different address. In some ways you can combine the two on one server, but in many cases it's easier to separate the two.
At last, add this line at the top of your MIDDLEWARE array:
'corsheaders.middleware.CorsMiddleware',
In our notes app we'll add the following (I will explain it underneath):
# models.py
from django.db import models


class Note(models.Model):
    content = models.TextField()
# urls.py
from django.urls import include, path
from rest_framework import routers
from .views import NotesViewSet

router = routers.DefaultRouter()
router.register(r'notes', NotesViewSet)

urlpatterns = [
    path('', include(router.urls)),
]
# serializers.py
from rest_framework import serializers
from .models import Note

class NoteSerializer(serializers.ModelSerializer):
    class Meta:
        model = Note
        fields = '__all__'
# views.py
from rest_framework import viewsets
from .models import Note
from .serializers import NoteSerializer


class NotesViewSet(viewsets.ModelViewSet):
    queryset = Note.objects.all()
    serializer_class = NoteSerializer
Explanation:
models.py: we create a very simple model. Not much to explain here.
urls.py: if you have never worked with DRF, then the router part might be new. It's not that hard actually. We create a new router through DRF, this will create the necessary endpoints for us to use in Vue. More details on this later.
serializers.py: a serializer will help us pick the data we need from the model. This will serialize the query that we get from the database, which is then pushed through the view to the url.
views.py: This will serve multiple endpoints. Getting all notes, specific notes (through the id) and even post or delete notes.
The urls aren't added to our main urls.py file, so we need to do that to make the urls available to use. Go to back/urls.py and change the file to this:
# back/urls.py
from django.contrib import admin
from django.urls import path, include
from notes import urls as notes_urls

urlpatterns = [
    path('admin/', admin.site.urls),
    path('api/', include(notes_urls)),
]
At last, we also need to migrate the new Notes model to our database:
python manage.py makemigrations && python manage.py migrate
When you go to http://localhost:8000/api/notes, you will get something similar to this:
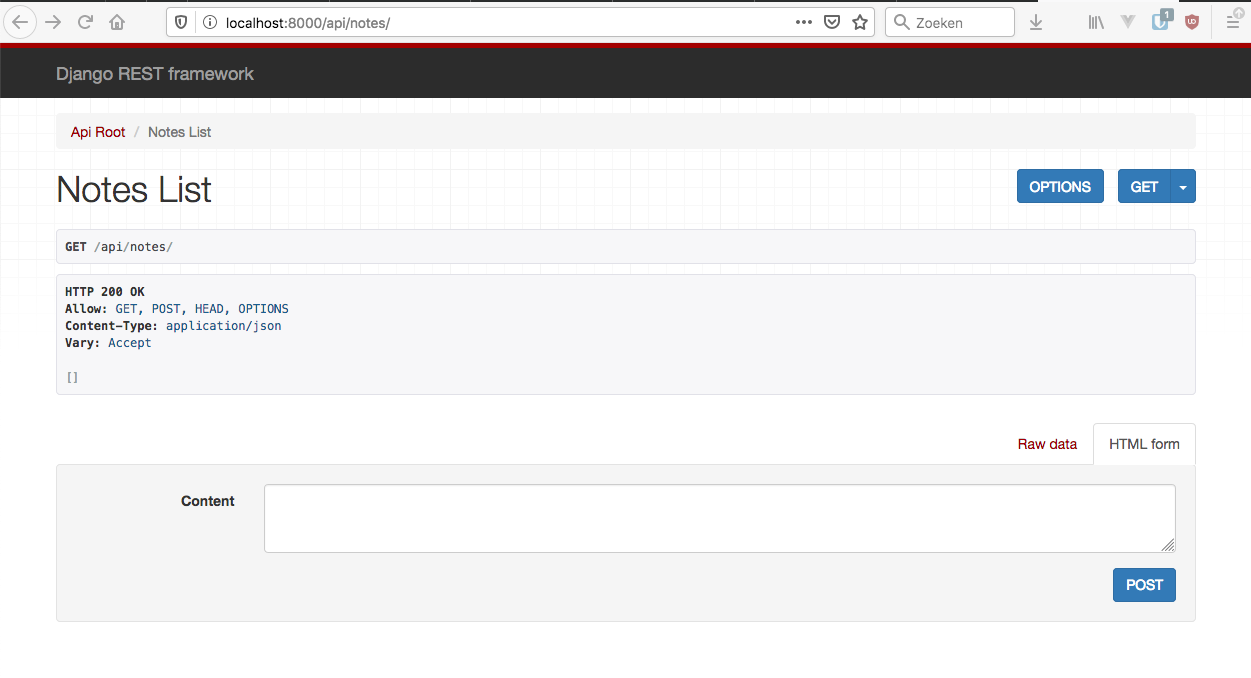
Create a note there, so we have something to work with in Vue!
Deployment for this might be a bit more tricky. If you are considering using different domains, then you will also need this: https://github.com/adamchainz/django-cors-headers
Making requests to Django through Vue
Now that we have an endpoint to work with, we can go to the Vue project and show it there. We will keep it simple here. If you need a much more detailed tutorial, then consider buying my Django and Vue course!
In Vue, we need to install a library to make it easier to do HTTP requests. We will go for the standard, which is currently, axios. Install it in your vue folder:
npm install axios
The front/src/App.vue file is the base of our application. We will have to modify it a bit to get the info from the API. This can be done by adding this part to the export default part, right under the components part:
mounted () {
  axios.get('http://localhost:8000/api/notes/').then((response) => {
    console.log(response.data)
  })
}
add this at the top, right under the <script> part to import the axios library:
import axios from 'axios'
When you reload the page, you should see the data that the API throws back at us. At least one note. Now we can almost use that in our app. First of all, we need to assign it to a variable to be able to use it in the <template> part. Replace console.log(response.data) with this.notes = response.data. That will assign the data to the notes variable, but that variable doesn't exist yet. Add this part as well:
export default {
  name: 'App',
  data: () => ({
    notes: []
  }),
  // ... component and mounted part
}
The data part is for all our variables (in this case only one). Now we can use notes in our template. Add {% raw %}{{ notes }} right under the HelloWorld part. When you refresh the page now, you will see it added the raw data at the bottom of the page (you may need to scroll a bit). To only show the first item, change {% raw %}{{ notes }} to {% raw %}{{ notes[0].content }}.
That's it. Now you are showing data from Django in Vue. Now, this is only the very tip of the iceburg. There is so much you can do with Django and Vue! Again, if you are interested, definitely check out my course about Django and Vue, where I explain how to work efficiently and clean with those two awesome frameworks.
2. Use Vue.JS in Django templates
The other way to use Vue in Django is to simply import the Vue.JS library and then start coding. Here is how you can do that.
Import the Vue.JS library.
Preferably at the bottom of your template (right before the </body> tag), import the library with this line of code:
<script src="https://cdn.jsdelivr.net/npm/vue/dist/vue.js"></script>
Up next, we will have to define what part we want to manage with Vue. We will have to give that a specific id. The general approach is to go for the #app id (but you can use anything, as long as you are consistent). That would look like this:
<div id="app">
  # the part that can be controlled by Vue.JS
</div>
At the bottom, right under the script import, we can start coding with this little bit:
<script>
var app = new Vue({
  el: '#app',
  data: {
    message: 'Hello Vue!'
  }
})
</script>
The el: '#app' is the part that will refer to the div we added.
We can then show the message variable in our data part with this code (within #app):
{{ message }}
But wait... there is an issue there. Django uses the same {% raw %}{{ }} for variables that are passed down from the views. We will have to change the ones from the Django template language or Vue, otherwise, the Django template language will always render them first and Vue won't be able to do anything with them anymore. It's best to change the Vue ones by adding delimiters:
<script>
var app = new Vue({
  el: '#app',
  delimiters: ['[[', ']]'],
  data: {
    message: 'Hello Vue!'
  }
})
</script>
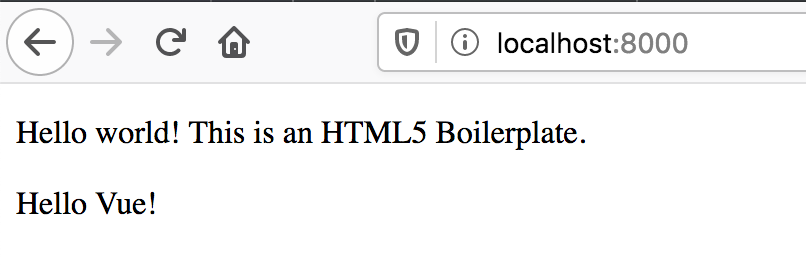
In full, we would get something like this:
<!doctype html>
<html>

  <head>
    <meta charset="utf-8">
    <title></title>
    <meta name="viewport" content="width=device-width, initial-scale=1">
  </head>

  <body>
    <div id="app">
      <p>Hello world! This is an HTML5 Boilerplate.</p>
      <p>[[ message ]]</p>
    </div>
    <script src="https://cdn.jsdelivr.net/npm/vue/dist/vue.js"></script>
    <script>
      var app = new Vue({
        el: '#app',
        delimiters: ['[[', ']]'],
        data: {
          message: 'Hello Vue!'
        }
      })
    </script>
  </body>
</html>
And voila! It works:
Personally, I try to avoid this wherever I can, except when I only have a very small bit of Javascript that I want to implement. Those times, I generally go with vanilla JS instead of Vue though. All-in-all, I rarely use Vue this way.
Django Vue ajax javascript tutorialStan is professional web developer working mainly with Django and VueJS. With years of experience under the belt, he is comfortable writing about his past mistakes and ongoing learnings.