Django Rest API
Most Restful APIs build with the very popular Django Rest Framework. The general use case of the Django Rest Framework is to build private or public APIs. The Framework is actually a package that can extend the existing Django functions and make it easier for you to create those standalone API.
How does Django work?
I am going to assume here that you already know the Django framework. But in case you don't then Django is a great web development framework build on python which can handle both small web apps as well as large enterprise apps. Some big name companies are using Django for their applications, like Robinhood, Instagram, Zapier and Disqus!
Django was build in a way that it uses a similar structure to MVC. MVC stands for Model (databases layout), View (the templates), Controller (the logic). For Django, this is actually MVT (Model, view, template) - the view is the controller with Django. This structure is used to simplify and organize your code. If you have been a few years in the industry (like me), then I bet you remember the days that everything was in the same file. The the database queries, the templates and whatnot. Glad those days are over now.
This MVC standard is great for building dynamic websites. Though, there is an issue with this. With every change and every update you do, it needs to refresh the page. It's not reactive based on the things you do.
What's the Django rest framework?
The Django Rest Framework is a Django package that can be installed in your environment with pip install djangorestframework (more on that later) and it's used to build Restful APIs. Actually, you can do the exact same thing with Django without this package. Though, in that case you would be reinventing the wheel quite a few times. The Django Rest Framework package is a huge timesaver as it will set you up with everything you need to build APIs quickly.
The Django rest framework doesn't have templates. It returns JSON text (or only a status code). It can have multiple use cases: you can use this library to create endpoints to be consumed by end users as a private API, you can use the endpoints to be used for a mobile app or you can use the endpoints to be consumed by your javascript frontend. We are going to dive a bit deeper in the first and last usecase in this tutorial. Here is an example of what the API could return to you when you create an endpoint to get a specific user:
{
  "id": 0,
  "email": "user@example.com",
  "first_name": "string",
  "last_name": "string",
  "position": "string",
  "phone": "string",
  "start": "2018-05-31T00:46:29Z",
  "timezone": "string",
  "is_active": true
}
That's all it is, really.
How do we install the Django Rest Framework?
Before you can actually create a Django Rest API, you will have to install it like any other plugin you install for Django. Simply use pip (pip install djangorestframework) or you can clone the project from Github (git clone git@github.com:encode/django-rest-framework.git - not recommended).
Then in your settings.py add rest_framework in the INSTALLED_APPS array.
Great, Django Rest Framework is installed now. Let's create the Django Rest API now.
Django Rest Framework tutorial: a very simple API
For this example API, we will create an API around the object Article. It will have a title field, a text field and a date field.
Let's create the model Article first. In your models.py file add this:
class Article(models.Model):
    title = models.CharField(max_length=500)
    content = models.TextField()
    date = models.DateTimeField(auto_now_add=True)
With this model, it will automatically add a date when an article is created. Now, we need to create a serializer to make sure that the data gets sanitized and published correctly. if you come from a background with using forms in Django, then you will probably recognize that there is the same pattern with the seralizers.
If not already there, create a serializers.py file in your app folder. Here is how our Article serializer will look like:
from rest_framework import serializers
from yourappname.models import Article

class ArticleSerializer(serializers.HyperlinkedModelSerializer):
    class Meta:
        model = Article
        fields = ('id', 'title', 'content', 'date')
Up next we need to create a view in our views.py. This is to tell Django what to show exactly with what serializer and what model. Here is how ours will look like:
from rest_framework import viewsets
from yourappname.models import Article
from yourappname.serializers import ArticleSerializer

class ArticleViewSet(viewsets.ModelViewSet):
    queryset = Article.objects.all()
    serializer_class = ArticleSerializer
As you can see we created a viewset that is inherited from the ModelViewSet. The ModelViewSet is a set of views that is build to create simple requests to this view. Like get, post and patch (you can overwrite any of these). As you can see, we added a queryset, which is where the records will be pulled from. In this case, we want to display articles, hence why we picked the Article model. The serializer_class will tell what to accept as arguments for requests and what to show when something needs to get consumed from the api.
At last, we need to add a URL to send requests to. Let's open (or create) the urls.py and add the following:
from django.conf.urls import url, include
from rest_framework import routers
from yourappname.views import ArticleViewSet

router = routers.DefaultRouter()
router.register(r'articles', ArticleViewSet)

urlpatterns = [
    url(r'^', include(router.urls))
]
In the above snippet, create a DefaultRouter instance. This is basically Django Rest Framework's way of telling how to create urls for their ModelViewSet classes. Up next, we register the ArticleViewSet we created in our views.py and give a url (in this case this will create /api/articles/ and /api/articles/<id>/). Then we add the router urls to the urlpatterns.
Don't forget to run python manage.py makemigrations && python manage.py migrate to migrate the model we created and the default django rest framework models
Start Django again with python manage.py runserver and go to http://localhost:8000/articles/ in your favorite webbrowser. Voila! We have now a cool API endpoint. You will probably see something similar to this:
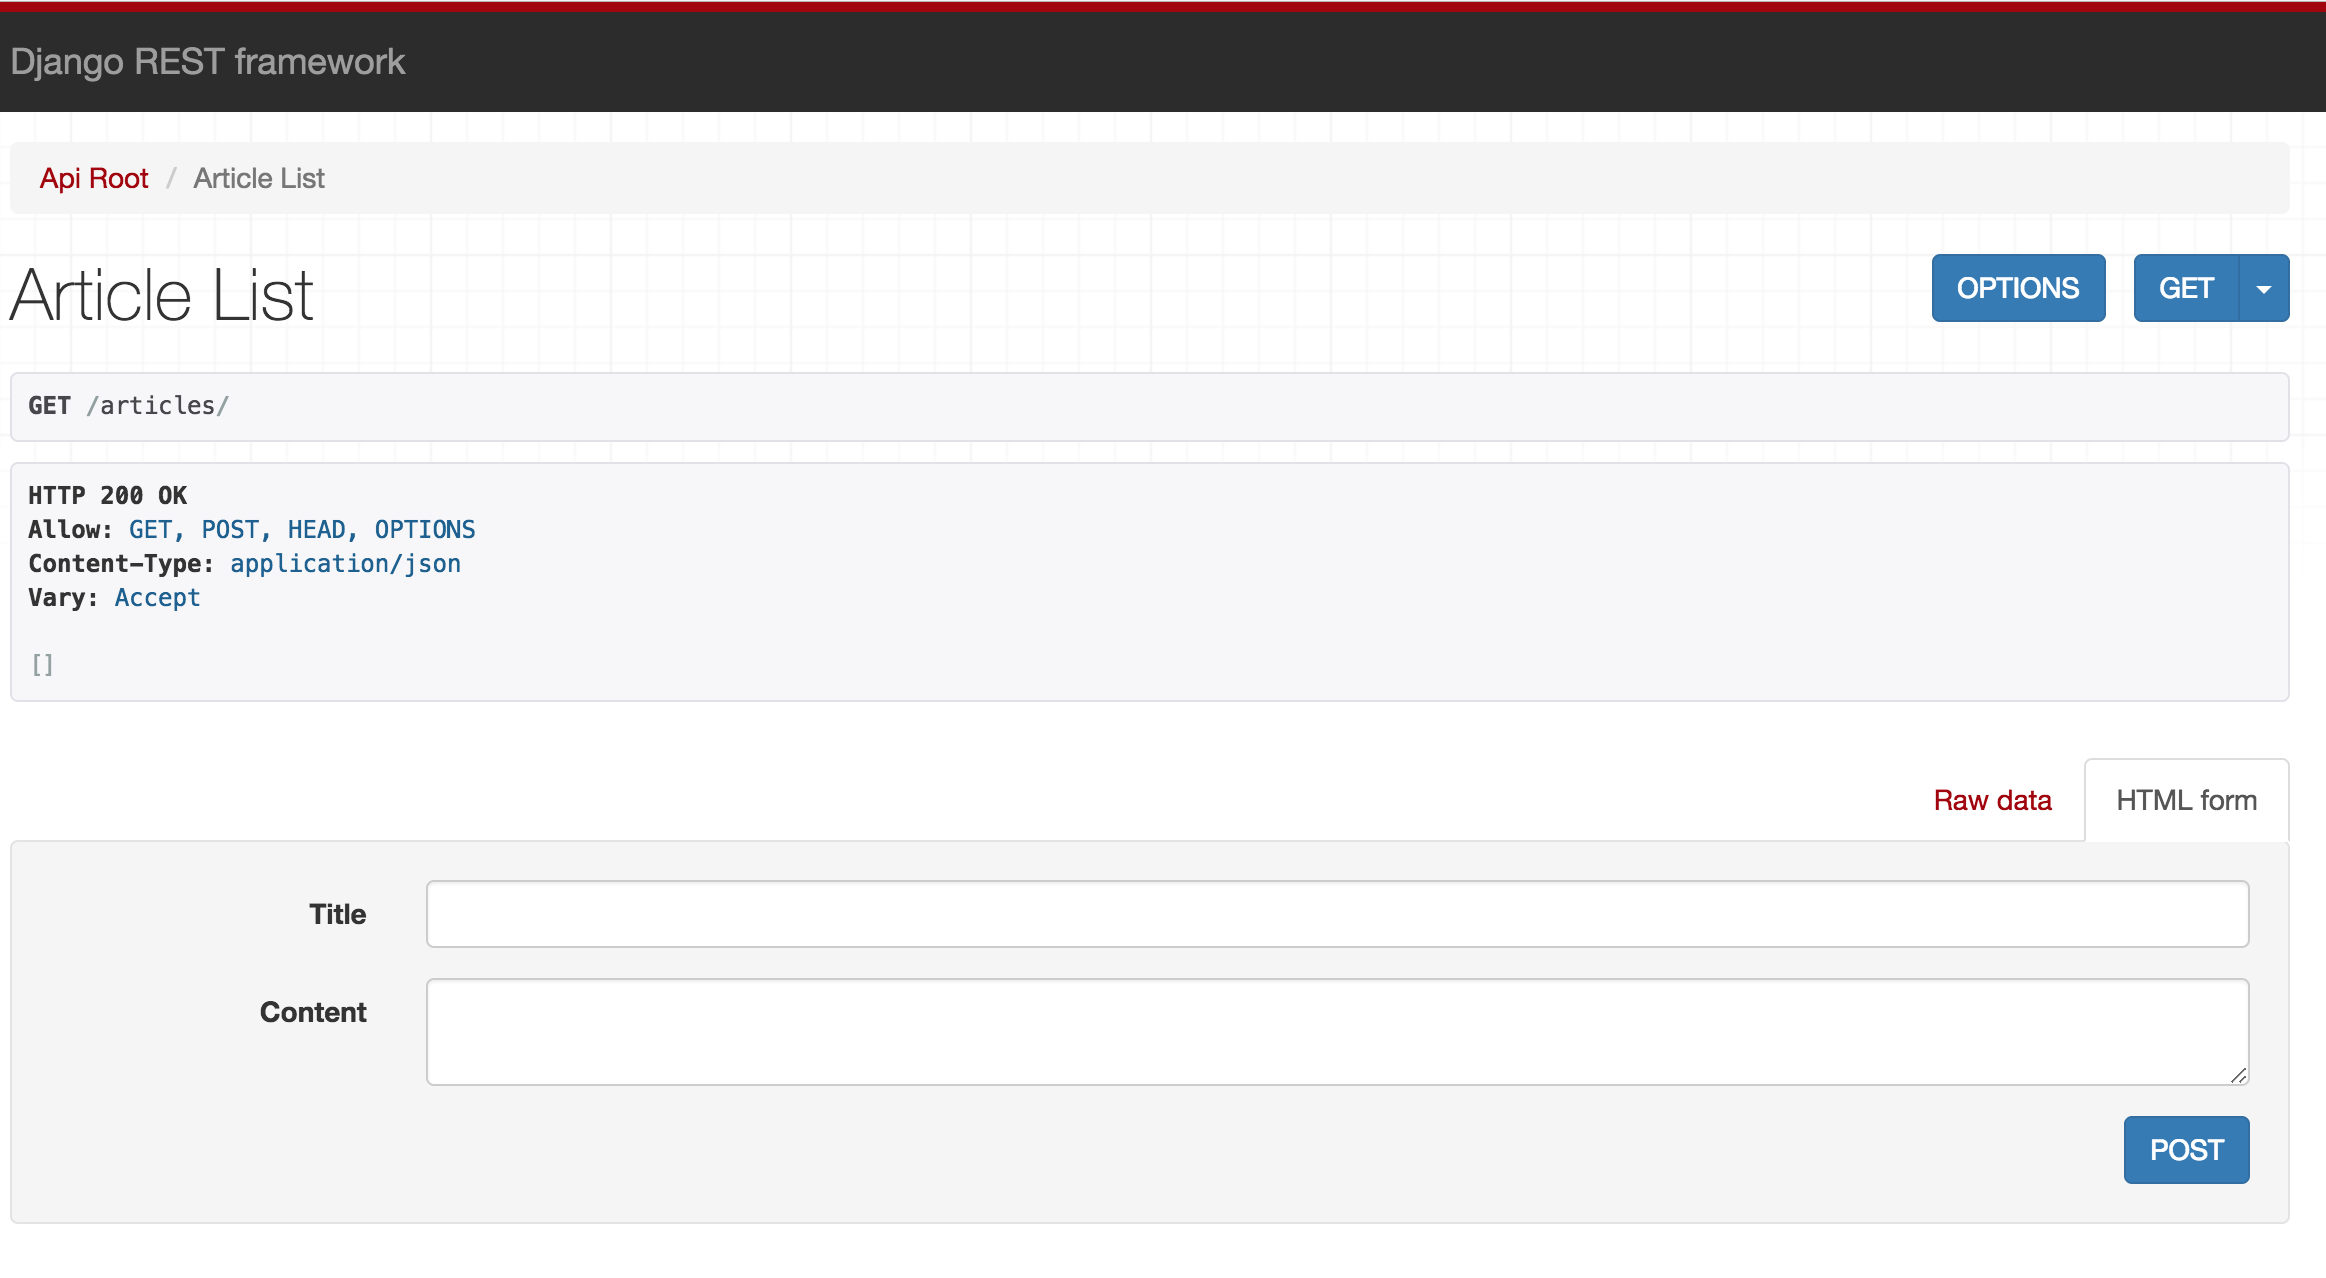
You can now also do curl http://localhost:8000/articles/ in your terminal/shell. It will respond with [] as there are no items in it just yet.
http://localhost:8000/articles/ is now one of the endpoints you can consume to create and list articles. You can also look up specific articles by using http://localhost:8000/articles/<pk>/. Replace <pk> with the ID of your article.
Django Rest API Settings
You can customize the API quite easily. Simply go to your settings.py file and add the following dictionary:
REST_FRAMEWORK = {
    'DEFAULT_AUTHENTICATION_CLASSES': (
        'rest_framework.authentication.TokenAuthentication',
        'rest_framework.authentication.SessionAuthentication'
    ),
    'DEFAULT_PAGINATION_CLASS': None,
    'DEFAULT_RENDERER_CLASSES': (
        'rest_framework.renderers.JSONRenderer',
    ),
}
In this dictionary, you can add various Django Rest Framework settings. Here are a few that are commonly used
DEFAULT_AUTHENTICATION_CLASSES
The DEFAULT_AUTHENTICATION_CLASSES is a setting that you can use to set the authentication for what users can use to authenticate themselves. For example: you can add rest_framework.authentication.TokenAuthentication to only allow people with a valid token to view or make changes to the API.
A full example of that would be:
REST_FRAMEWORK = {
    'DEFAULT_AUTHENTICATION_CLASSES': (
        'rest_framework.authentication.TokenAuthentication',
        'rest_framework.authentication.SessionAuthentication'
    ),
}
In the above example, we allow users to use either a token or a session to access our API. It will first check for a token and then check for a session in this case.
DEFAULT_RENDERER_CLASSES
The DEFAULT_RENDERER_CLASSES is a setting that allows you to select how the endpoints are shown to users. As you have seen before, we can now see the API visually with a nice GUI. You can disable that with this setting. Here is a full example of that:
REST_FRAMEWORK = {
    'DEFAULT_RENDERER_CLASSES': (
        'rest_framework.renderers.JSONRenderer',
    ),
}
In the above example, we disable the GUI and only show JSON responses.
DEFAULT_PERMISSION_CLASSES
With the DEFAULT_PERMISSION_CLASSES you can assign custom permissions to your API. A good usecase would be when you have different kind of users. Let's say you have a publisher and reader. A publisher should be able to read articles. A reader should not. We can easily deny requests with a permissions file (more on this in the next chapter).
REST_FRAMEWORK = {
    'DEFAULT_PERMISSION_CLASS': ('yourappname.permissions.AdminPermission',)
}
Permissions
Let's create a new file called permissions.py. This will be our file to define permission classes with. A permission could look like this:
from rest_framework import permissions

class AdminPermission(permissions.BasePermission):
    def has_permission(self, request, view):
        if request.user.is_authenticated() and request.user.is_publisher:
            return True
  return False
The above snipped will deny any requests from users that are not authenticated and users that are not publishers.
Some helpful extra packages you might want to consider
This package will install some other dependencies as well. Then you can extend the package a bit more with the following packages. Those are all optional.
CoreAPI (pip install coreapi)
This is a package that will allow you to consume your API as objects instead of standard JSON. If you are not familiar with CoreAPI, then it's best to ignore this package for now.
MarkDown (pip install markdown)
MarkDown itself is known for it's ease to style text documents. This can be used to document your API. If you are not planning on documenting your API, then there is no need to install this package.
django-filter (pip install django-filter)
Django-filter is a library that let's you filter out fields that you actually don't want to transfer to your frontend. This can be used to save bandwidth and only send data that you are actually going to use. You can limit the amount of data is send by using serializers, but this package allows you to quickly filter models instead of creating a new serializer.
django-crispy-forms (pip install django-crispy-forms)
This package is really useful when you are using django-filter as well. With Crispy Forms you can help with displaying filter options in html forms when you are using the GUI interface.
drf_yasg (pip install drf_yasg)
This is a very simple library that will build API documentation automatically. This is best to use when you are building an API for users/customers.
DRF Django REST resourcesStan is professional web developer working mainly with Django and VueJS. With years of experience under the belt, he is comfortable writing about his past mistakes and ongoing learnings.