Hello world! This is an HTML5 Boilerplate.
``` Go to [http://localhost:8000/](http://localhost:8000/?ref=djangowaves.com) and you should be welcomed with: `Hello world! This is an HTML5 Boilerplate.` That's the text we will translate. ## Enable i18n and l10n These settings should already be enabled by default in Django (it is in Django 2.2.x & 3.0.x). Just in case they change this in future, find the following settings in your `settings.py` file: ```python LANGUAGE_CODE = 'en-us' TIME_ZONE = 'UTC' USE_I18N = True USE_L10N = True USE_TZ = True ``` Make sure at least `USE_I18N` and `USE_L10N` are set to `True`. We need both to make multi-language work. ## Translating We can translate text both in the views and templates. Let's start with translating in the templates. ### Translating in templates Go to the `home.html` file in your template folder. Then add `{% load i18n %}` at the top of that template. This will load the Django library to translate your text. In the example we created, we have the text `Hello world! This is an HTML5 Boilerplate.`. Let's translate that to something else. To be able to do that, we will have to wrap some code around that string. Change it to this: ``` {% trans "Hello world! This is an HTML5 Boilerplate." %} ``` You might notice that nothing has actually changed on our site. That's because it will just default back to the text within the quotes if no language is set up. I'll explain this a bit more later. ### Translating in views Translating text in templates is only half of what you can do. If you have text in views that you, for instance, dynamically change based on behavior/values, then you also translate these in your views - before you push them to the template. You can do that with `gettext()`. That might sound a bit vague. Here is an example: ```python from django.utils.translation import gettext as _ def index(request): text = _("this is some random text") return render(request, 'home.html', { 'text': text }) ``` And then you can add the `text` variable in your `home.html` file. If you want to save on your resources, you can also load text "lazy". Use `gettext_lazy()` for that, but be careful! It sort of caches the translations, which means that it will sometimes show the wrong text if you change that string often. You can use `gettext_lazy()` safely in things that don't change. That could include helptext in models for example. For `views.py` files, I would recommend to use `gettext()` to be safe. Now, before you can use `gettext`, you will have to install it on your computer. If you are on Mac, this should do the trick: ``` brew install gettext brew link --force gettext ``` For Windows, you can download and install it [here](https://mlocati.github.io/articles/gettext-iconv-windows.html?ref=djangowaves.com). ## Create translations with Django Our project is now ready to work with translations. Next step is to create the translation file and create the translations for it. First, we will need to create a new directory to store the translations in: ``` mkdir -p locale ``` Then, run this command in your project to create the translation files: ``` django-admin makemessages --ignore="static" --ignore=".env" -l nl ``` Note that we are ignoring the `static` and `.env` folders. By default, Django will go through all folders to find things to translate. The `static` folder should not contain any things that should be translated. The `.env` folder might contain some translations from other installed apps, but since they are likely already translated, we don't need to inspect that folder. There is a good reason to intentionally include the `.env` folder, though. That's when you are translating in a language that is not supported by Django by default (or any of the installed apps). If you would like to translate those strings as well, then you could consider to not exclude `.env` folder. Be warned: it's probably quite a lot to go through! We use `-l` to define the language that we would like to translate. As mentioned before, that is Dutch for me right now. **Note:** you might get an error that it can't find the folder we created earlier. It will look like this: ``` CommandError: Unable to find a locale path to store translations for file home/__init__.py ``` To fix that, we need to add this to our `settings.py` file: ```python LOCALE_PATHS = ( os.path.join(BASE_DIR, 'locale'), ) ``` When you re-run the previous command to create the translation files, it should output this: ``` processing locale nl ``` Check your project files. You can see that your `locale` folder has changed now. The file tree should look like this now: ```` locale `-- nl `-- LC_MESSAGES `-- django.po ``` The `django.po` file is important. It's the file where all translations are in (or will be in soon enough). It looks like this: ```python #: home/templates/home.html:19 msgid "Hello world! This is an HTML5 Boilerplate." msgstr "" ``` The `msgid` is the ID that is used to link all strings in the code to your translated lines. We need to complete the `msgstr`. That's the translation for the Dutch version. In this case, it will look like this: ```python #: home/templates/home.html:19 msgid "Hello world! This is an HTML5 Boilerplate." msgstr "Hallo wereld! Dit is een HTML5 Boilerplate." ``` We will have to do that for all strings in that file. Once that's done, the translation files will have to be compiled to something that Django uses to do the translation with. That can be done with this simple command: ``` django-admin compilemessages ``` Which will result in this: ``` processing file django.po in ~/blog-projects/languages/locale/nl/LC_MESSAGES ``` It has now created a `django.mo` file that we can't see or edit. That's fine. Remember though that you will always have to re-run the previous command after you have made changes to your translating file. To test if our translating in Django actually works, change your `settings.py` file. In my case, I will set it to `nl`. Change this: ```python LANGUAGE_CODE = 'en-us' ``` To this (for Dutch): ```python LANGUAGE_CODE = 'nl' ``` When you start the server, you will see that the lines have changed: 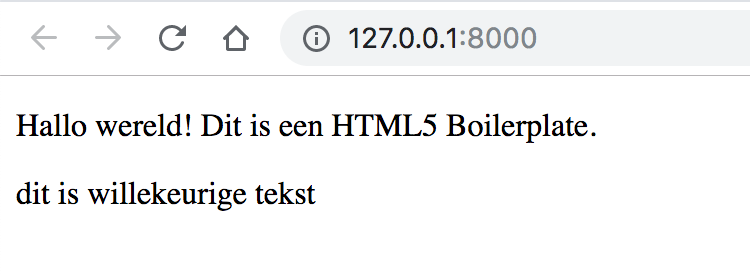 And that's it! Actually, we can take this one step further. Let's change the language of our text based on the user's defaults. In this case, I will assume you set up a [custom user model](https://djangowaves.com/resources/django-user-model/). If you didn't, then please do so as we will need it for this example. ## Languages based on user settings We will keep the default language at English. Therefore, we need to change the `LANGUAGE_CODE` setting back to `en-us`. We'll also have to add a new field to the `User` model where we can store the language per user. Simply add this to your model: ```python LANGUAGE_CHOICES = ( ('en-us', 'English'), ('nl', 'Dutch'), ) language = models.CharField(default='en-us', choices=LANGUAGE_CHOICES, max_length=5) ``` In our views, we will first have to check if the user is logged in. If the person is not logged in, we will go with the default language. We can check that with this line of code: ```python if request.user.is_authenticated: ``` Up next, we will have to set the language for this request. That's what this is for: ```python from django.utils import translation translation.activate(request.user.language) ``` The final `index` view looks like this: ```python from django.utils import translation def index(request): if request.user.is_authenticated: translation.activate(request.user.language) return render(request, 'home.html') ``` Alternatively, you can use the default [Django language middleware](https://docs.djangoproject.com/en/2.2/topics/i18n/translation/?ref=djangowaves.com#how-django-discovers-language-preference) to check what translation it should use. Let me know if you have any questions down below.